About


Help managing Docker development environment lifecycle.
Written in Crystal, distributed as a Docker multi-stage build image.
Architecture
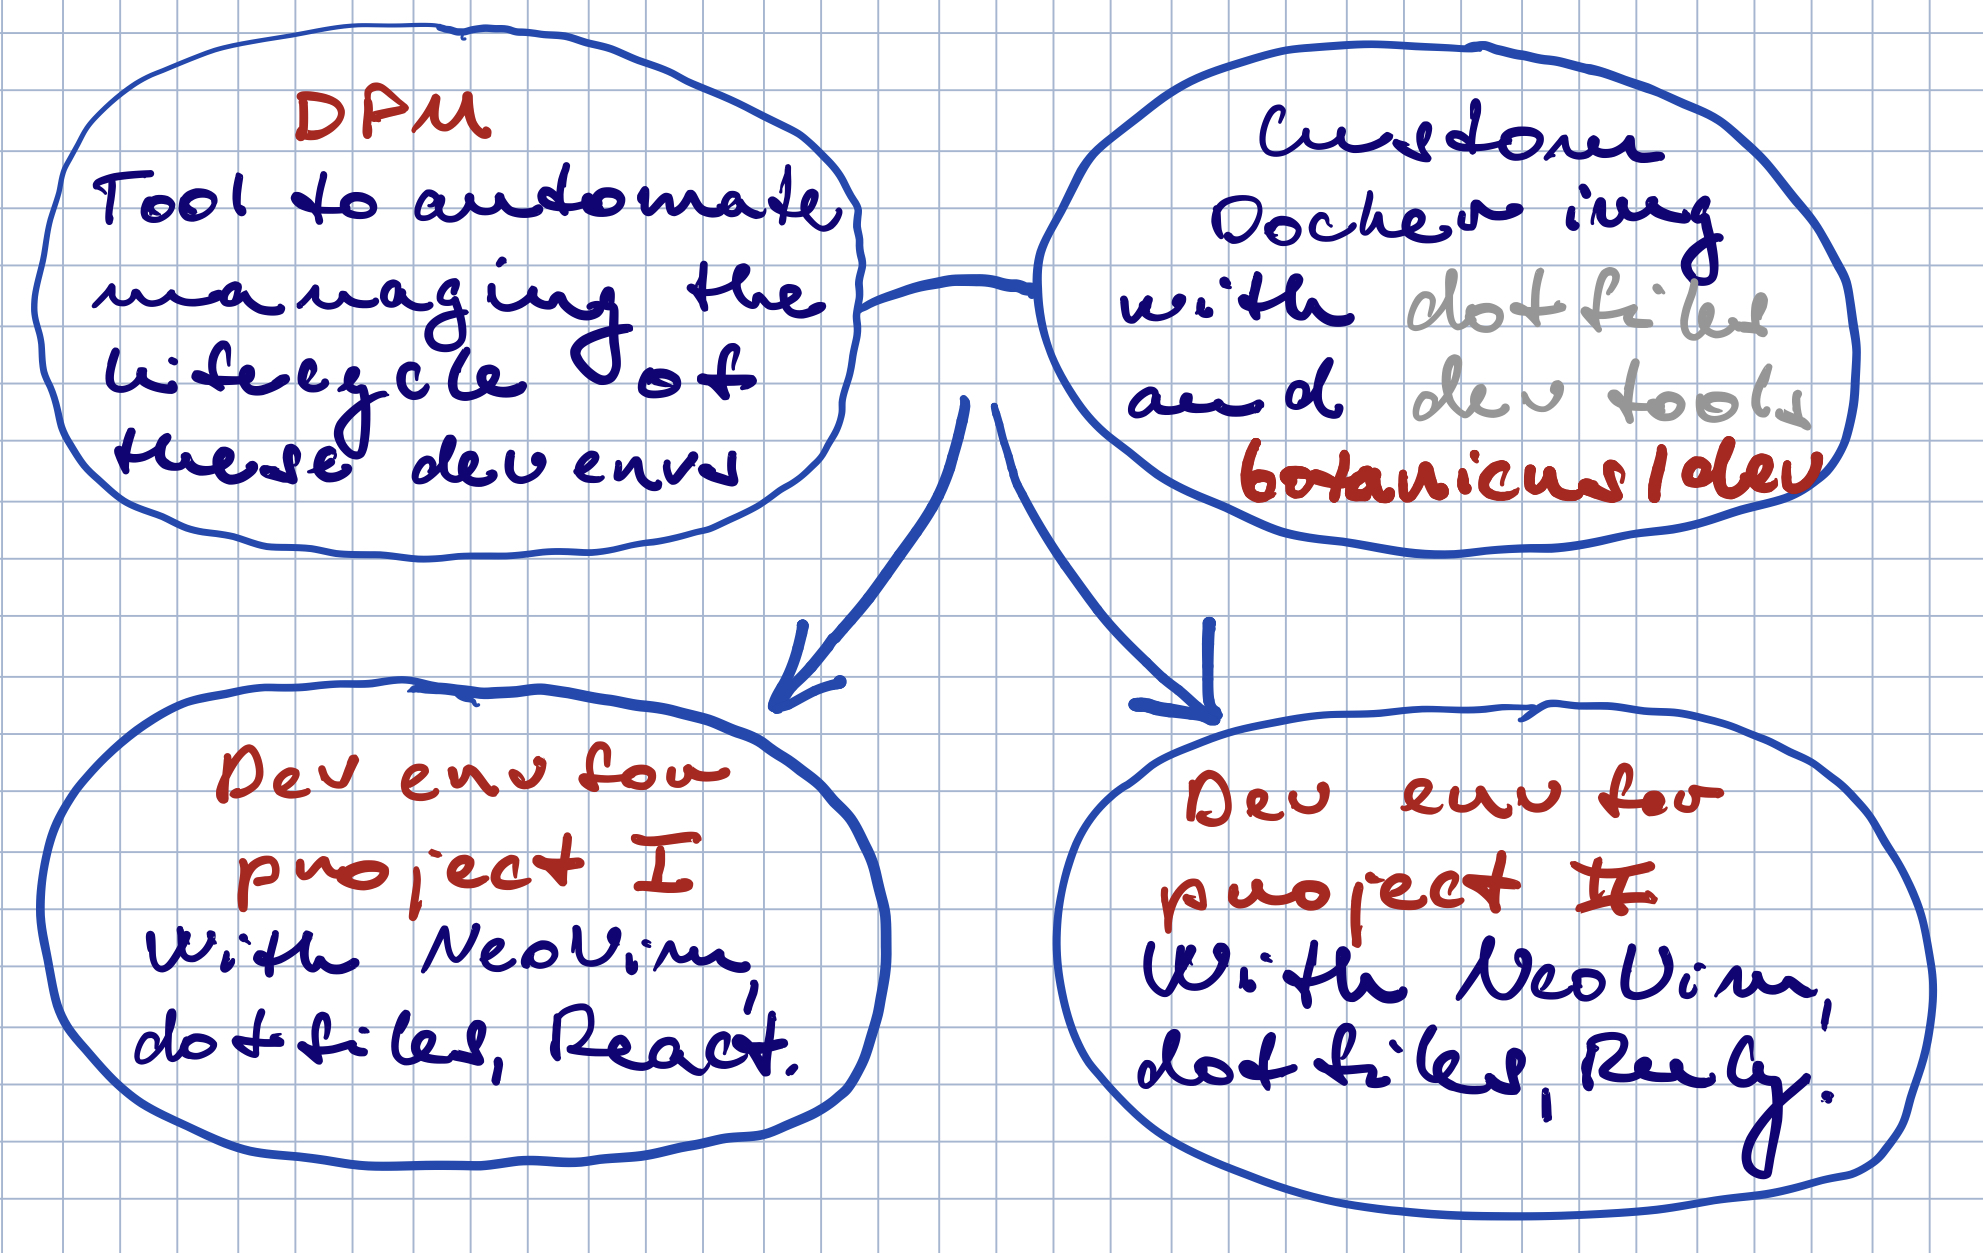
The less changes we have to do manually on each VPS, the easier is the management.
This project proposes that all you need to install is Docker.
Everything else should happen in Docker containers.
Please note that I'm talking about the development phase. This is not an alternative to docker-compose: in fact we are using docker-compose for managing more complex setup.
Tutorial
Let's see how we can set up dev environment for a simple React.js project, my blog.

In-depth
Copy of development environment
Dotfiles has been around for a while. It's indeed a good idea to have all the shell, Vim and other configuration files in one place and versioned.
Still. You get a new VPS, fetch your dotfiles and then you're installing and installing. Software from the OS package manager, Vim plugins, development dependencies, your dev tools ... it makes a lot of sense bake all this into a Docker image.
Docker-in-Docker
Since the development environment is an equivalent of our development machine, it's logical that we'll want to use Docker inside it.
This is possible and all the projects are automatically configured to support Docker-in-Docker.
That way every container feels like a real VM with no limitations.
Per-project VPS vs. per-project container
Before starting this, I would be using a per-project VPS. It's a very practical approach, especially for freelancers: once you're done with a project, you just delete the VPS and that's it. No mess is left behind.
With that said, there's an overhead with that. It's much easier to use just one VPS and run everything in containers that are behaving as full VMs, having root access (within container), Docker access (via Docker-in-Docker), everything just like on a standalone VPS. Besides, it's also cheaper.
Multi-repo containers
While each container should have only 1 project, it's perfectly reasonable that such project contains of multiple repositories.
For instance if you're writing a Ruby web app and you have a need to extract a library out of it, it makes sense to develop it in the same container. Especially as that allows us to point Bundler to the local library.
The typical setup would be via exposing multiple volumes:
VOLUME my_app
VOLUME my_gem
Isolation
So on our development VPS, instead of spinning this image and doing everything in it, it makes sense to spin a container for each project we are working on.
Persistence
When we spin a new container using docker create, the container is running. So our tmux session never dies.
Let's say we messed up the environment and we want to recreate it.
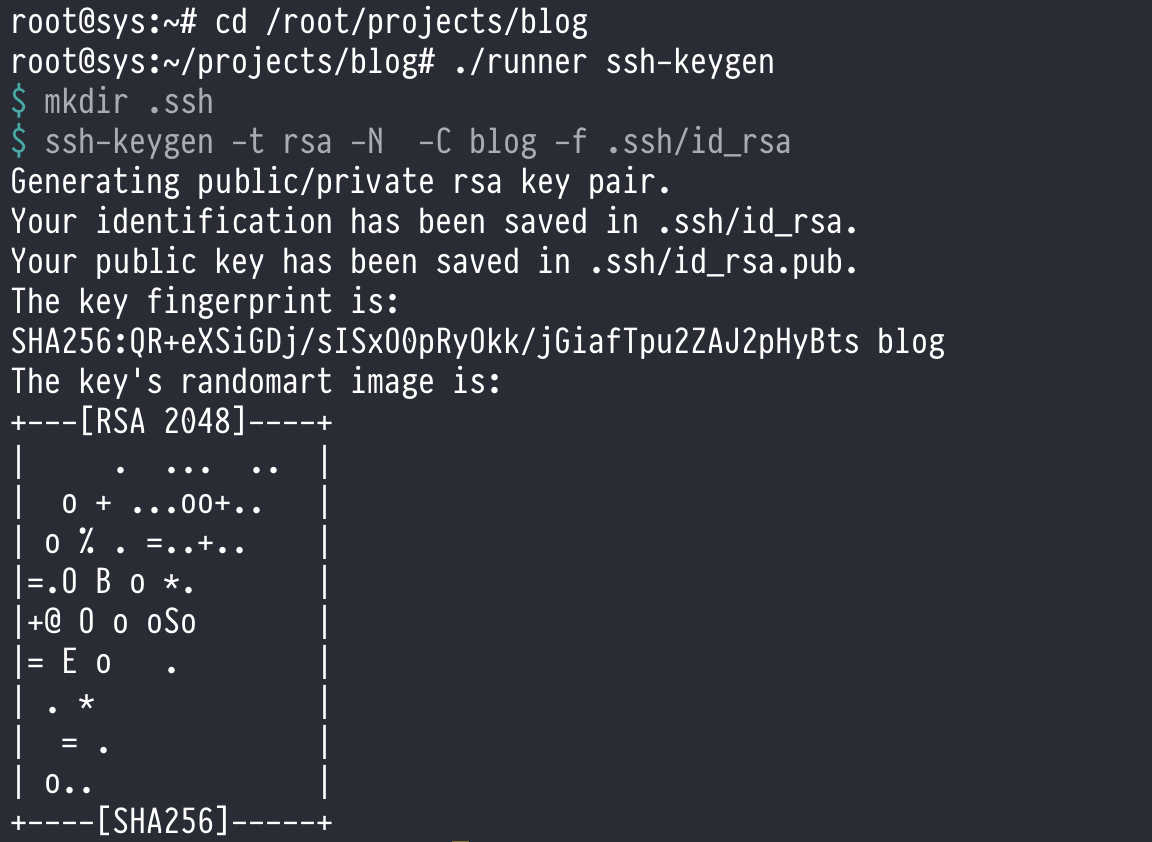
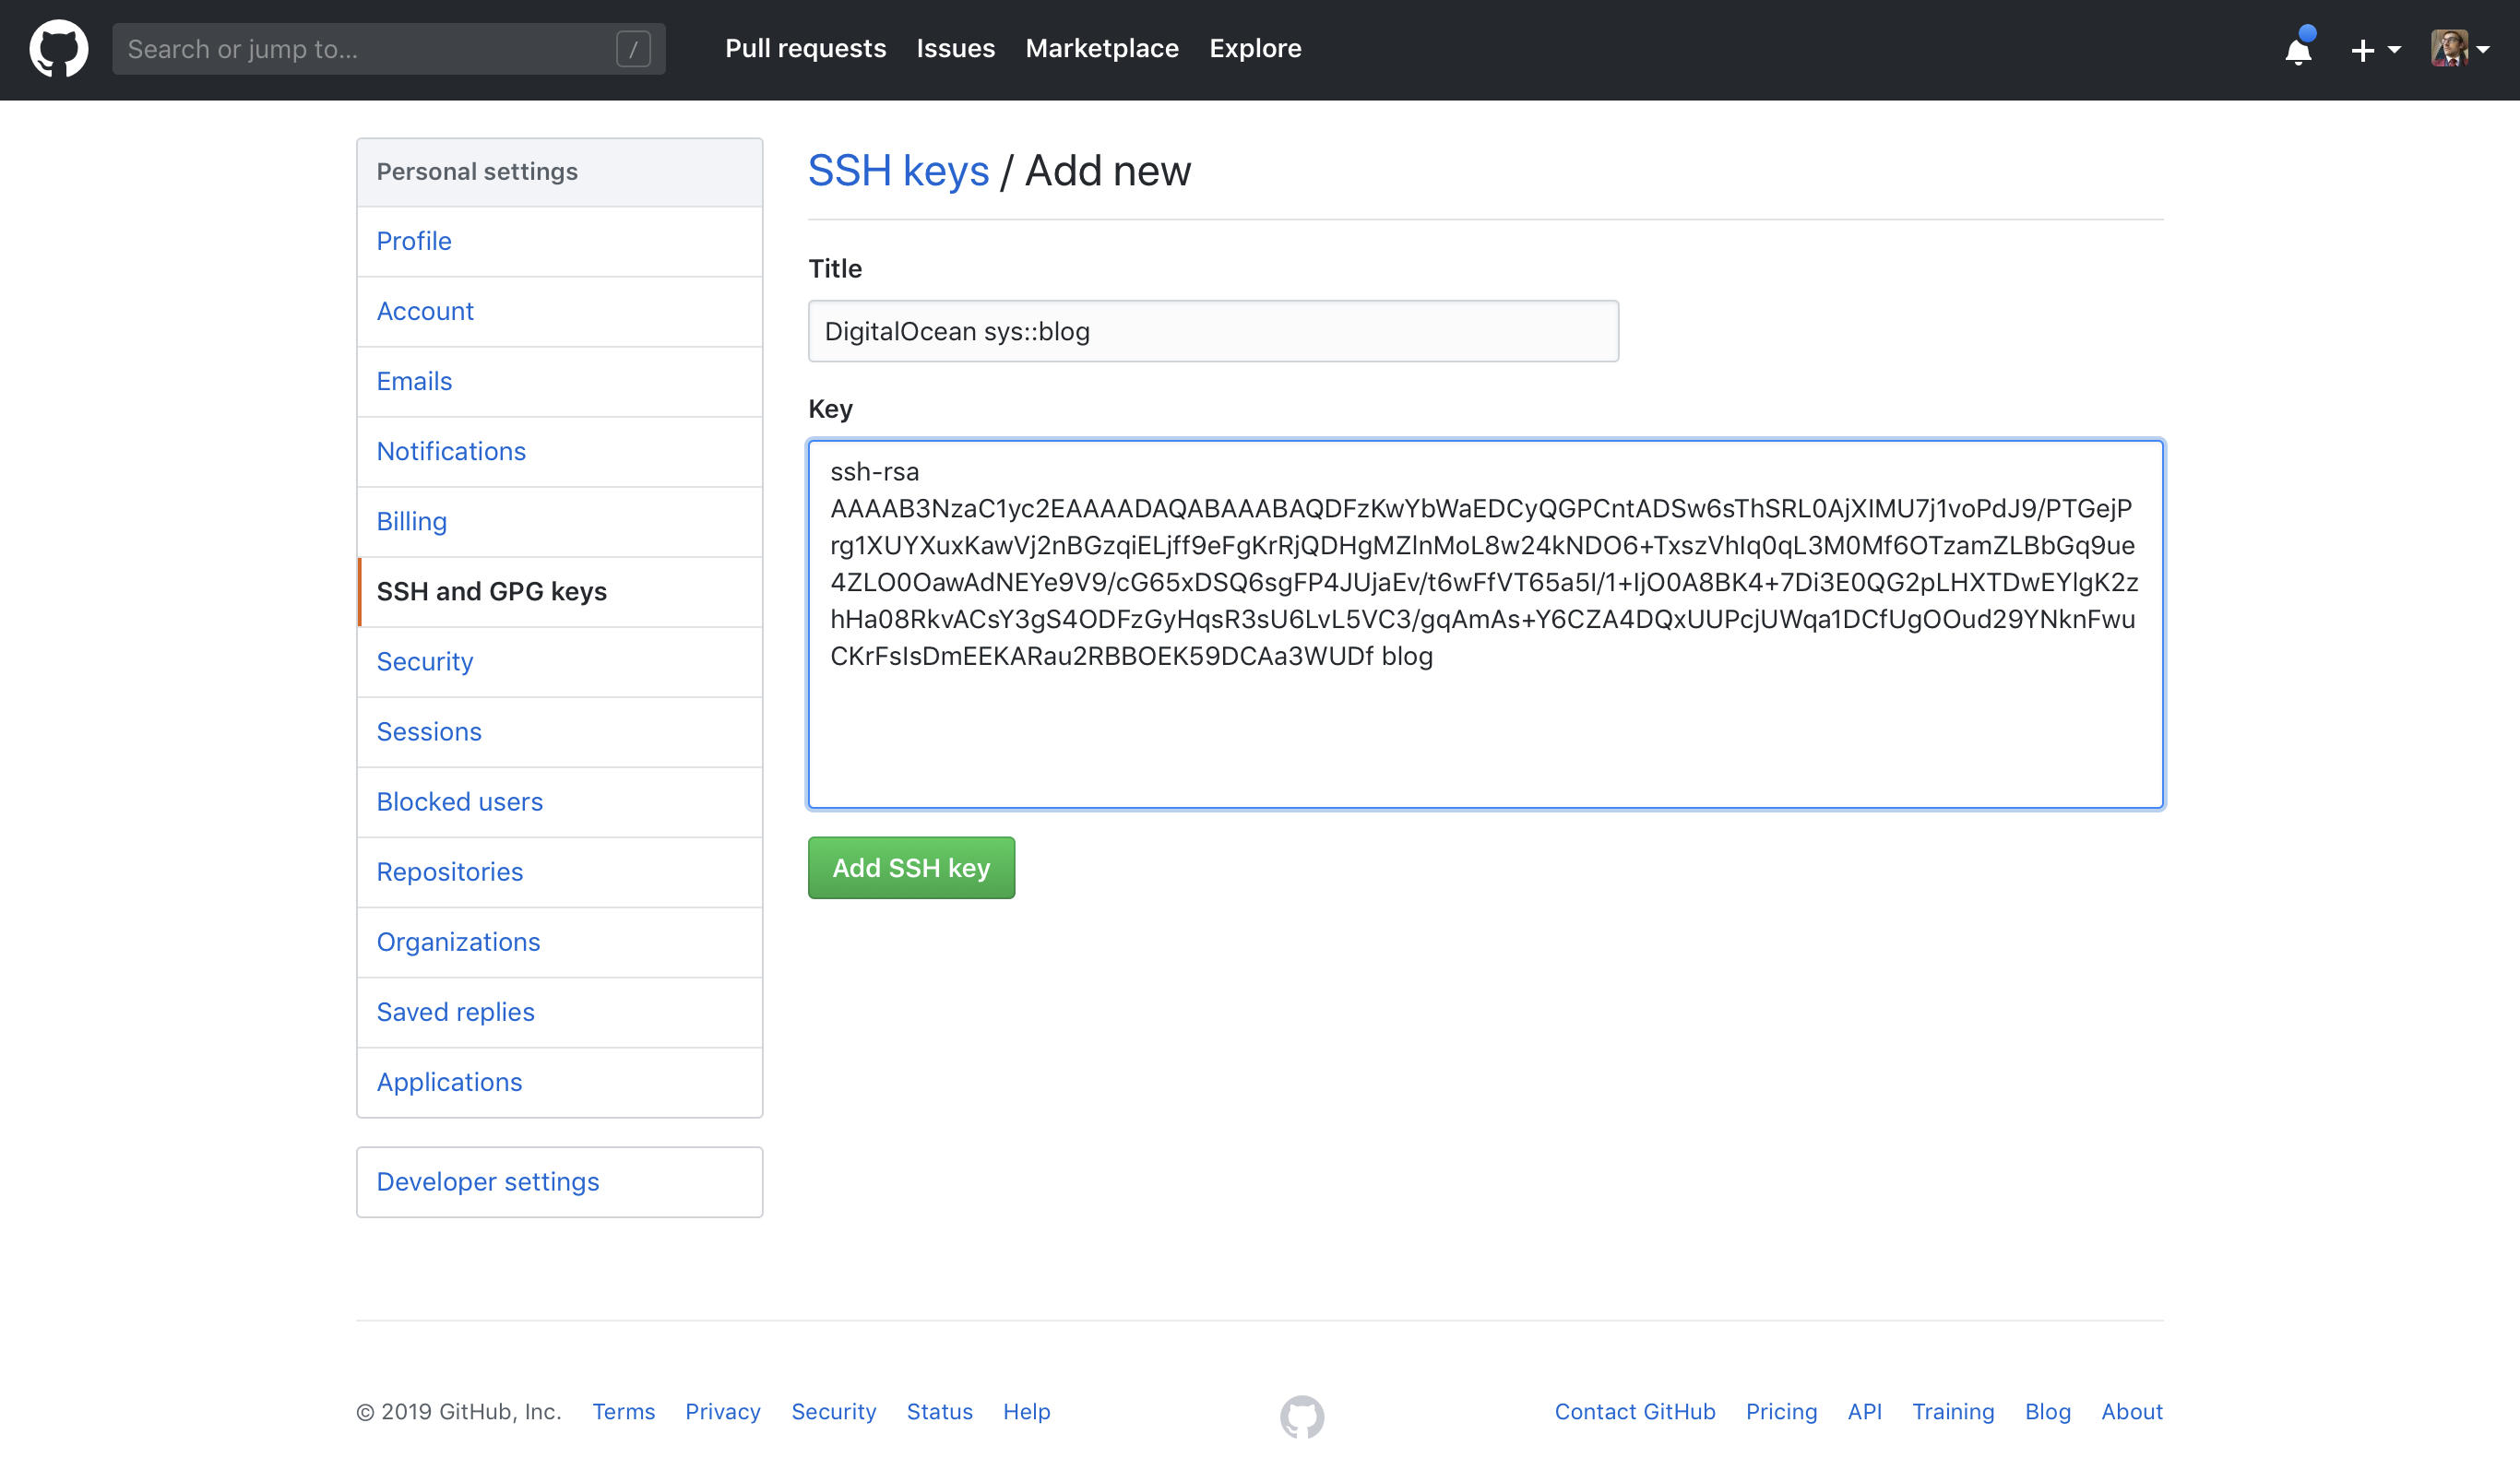
It'd be a huge bummer if our shell history and SSH keys (that are created per-project) would die with the old container.
That's why every project has its folder. It typically has:
Dockerfileto define ports that should be exposed (and published!), environment variables and volumes. Unlike the base development environment container, the image build from thisDockerfileis not meant to be published. This way we can bake in environment variables such as API keys and access tokens that are not meant for 3rd parties to see.- SSH keys directory and shell history file to be shared as volumes inside the container.
Note that there's no global state. It makes sense to isolate everything per project. If you want for instance use the same pair of SSH keys, just copy them to the project directory. This way it's all predictable and there are no surprises.
Beyond VPS life
With a vanilla setup like this, there's little reason to scrape the dev VPS, as there's virtually no risk we'd mess it up, creating the need to scrape it and reinstall it.
With that said, I'd like to add Dropbox sync in the future.
Usage
docker pull botanicus/docker-project-manager
mkdir ~/projects
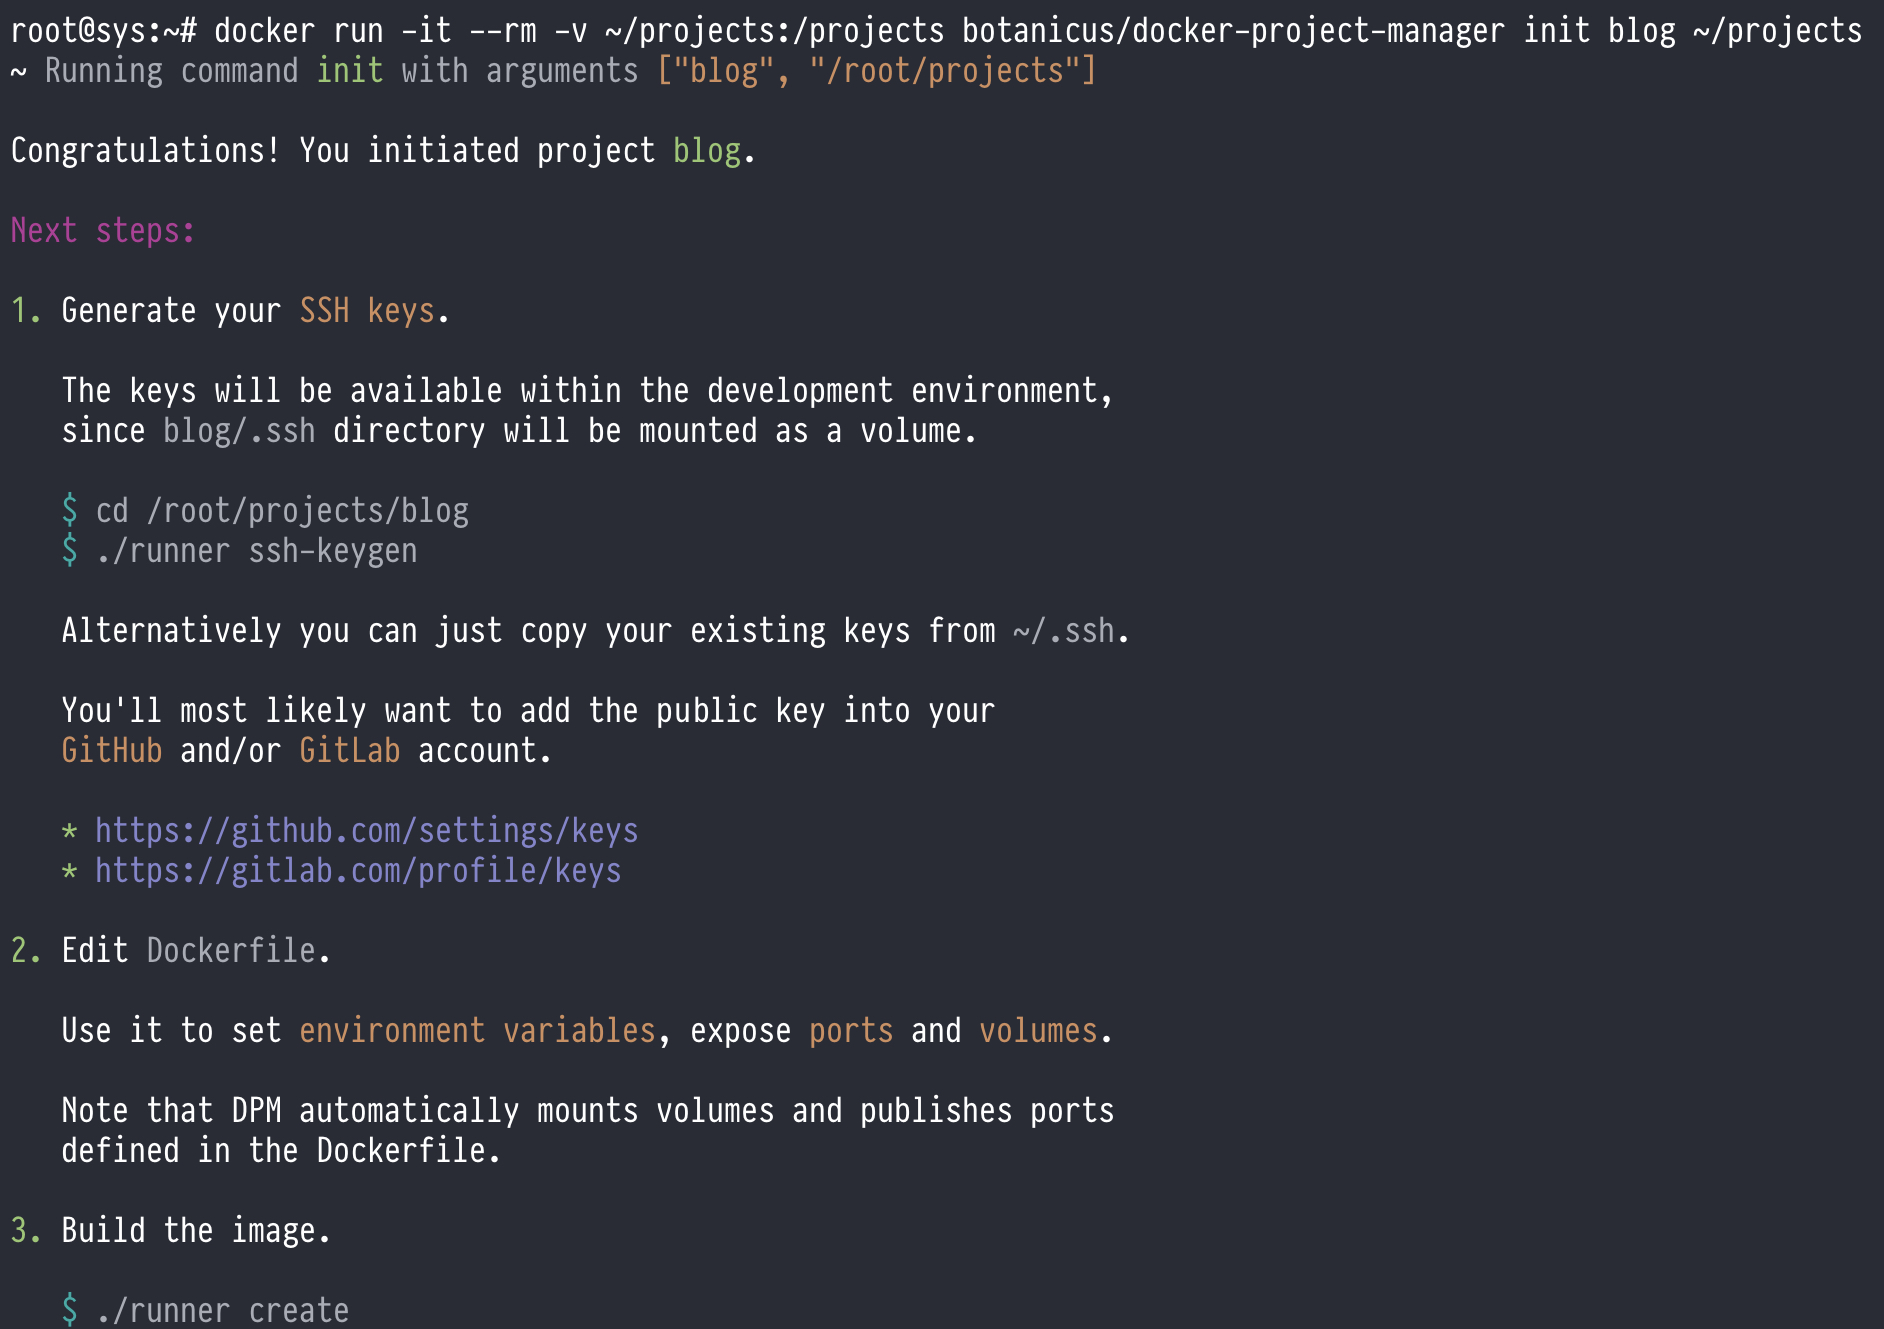
The init command
TODO: Document using custom templates via getting the DPM templates using docker cp, tweaking them, and then mounting directory with these as a volume over the one in DPM.
docker run -it --rm -v ~/projects:/projects botanicus/docker-project-manager init my-blogDevelopment
apt install libgmp-dev # TODO: Move this into our derived Dockerfile (managed by DPM).
shards             # Install the dependencies.

rake -T
# rake build       # Build the image
# rake sh          # Run SH in the image
# rake docker:try  # Test the project manually in Docker
# rake try         # Test the project manually
docker system df
docker image prune